|
4 min read
Setting up auto-crawl for your AI Chat: always up-to-date answers
Read more


Good that you have chosen to install the WhatsApp widget from Wappy on your Drupal website. In this blog, you will read how you can have the chat function of Wappy on your Drupal website in just a few simple steps.
Last updated: 12 Feb 2026
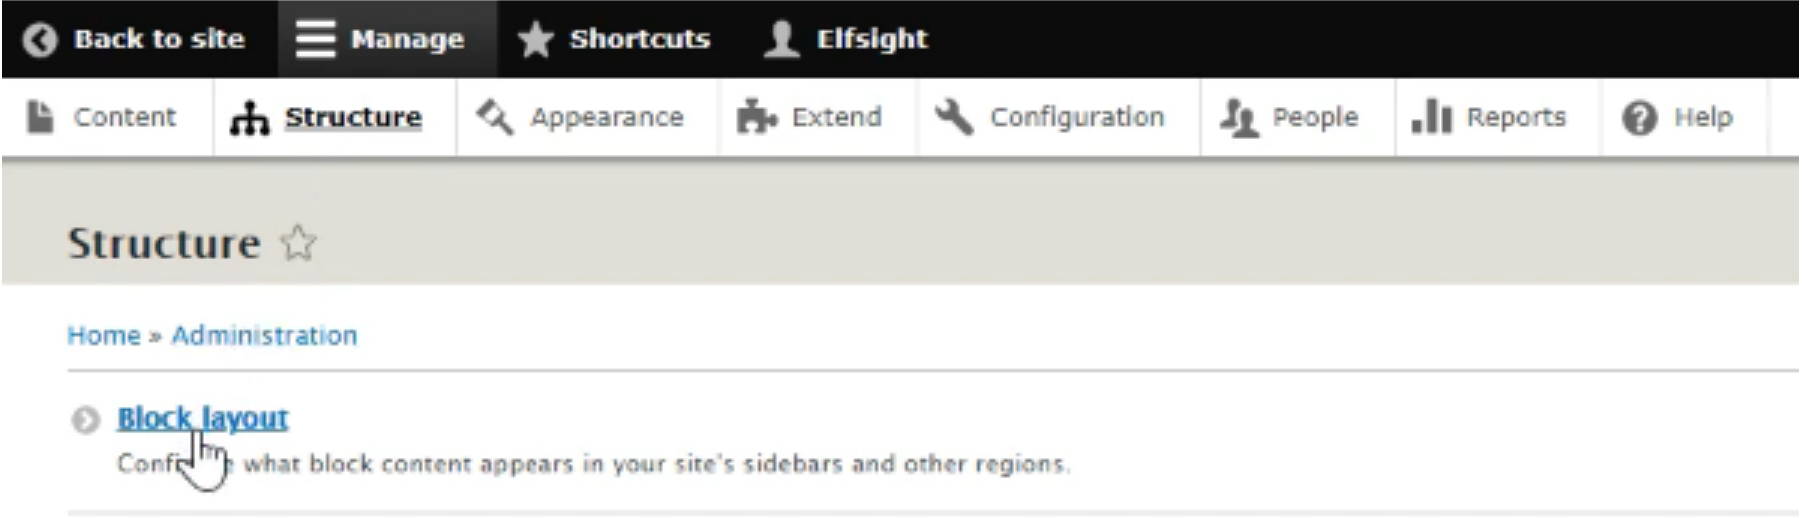
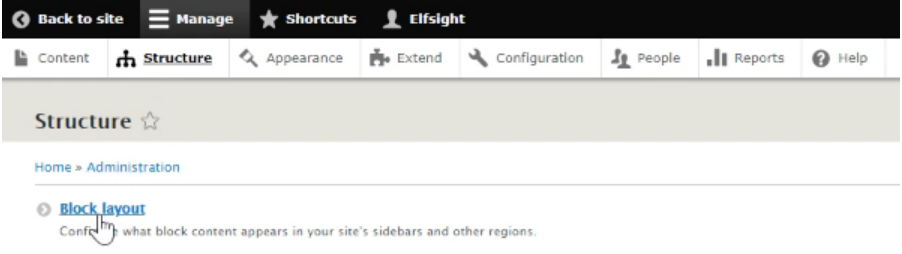
Log in to the admin panel of your website, or the administrator panel. After you have logged in to the Drupal admin panel, go to the tab called ‘Structure’. Then click on ‘Block Layout’.
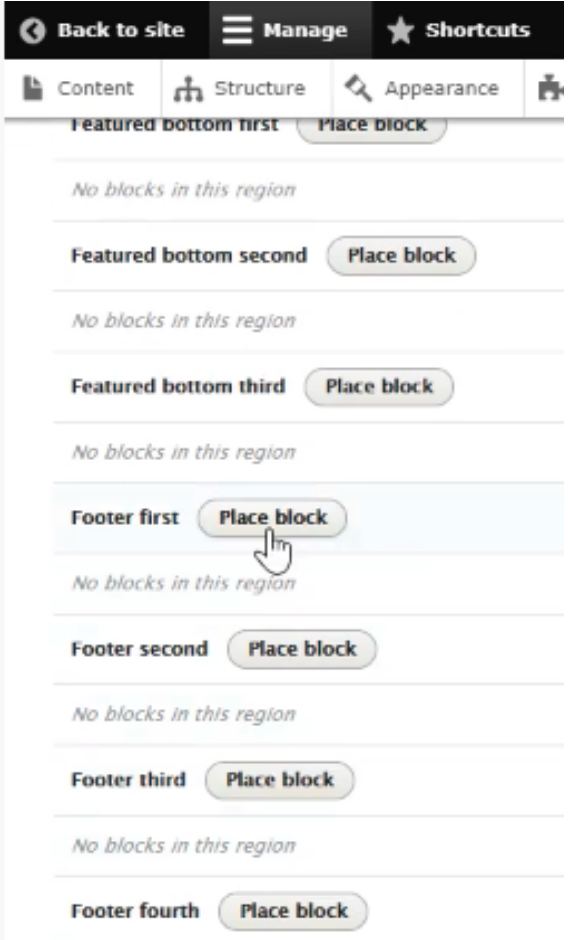
Scroll down and go to the footers section. Choose the footer in which you want to display the widget. For example, go for “Footer First” and click ‘Place Block’. Then click on the blue button named ‘+Add custom block’.
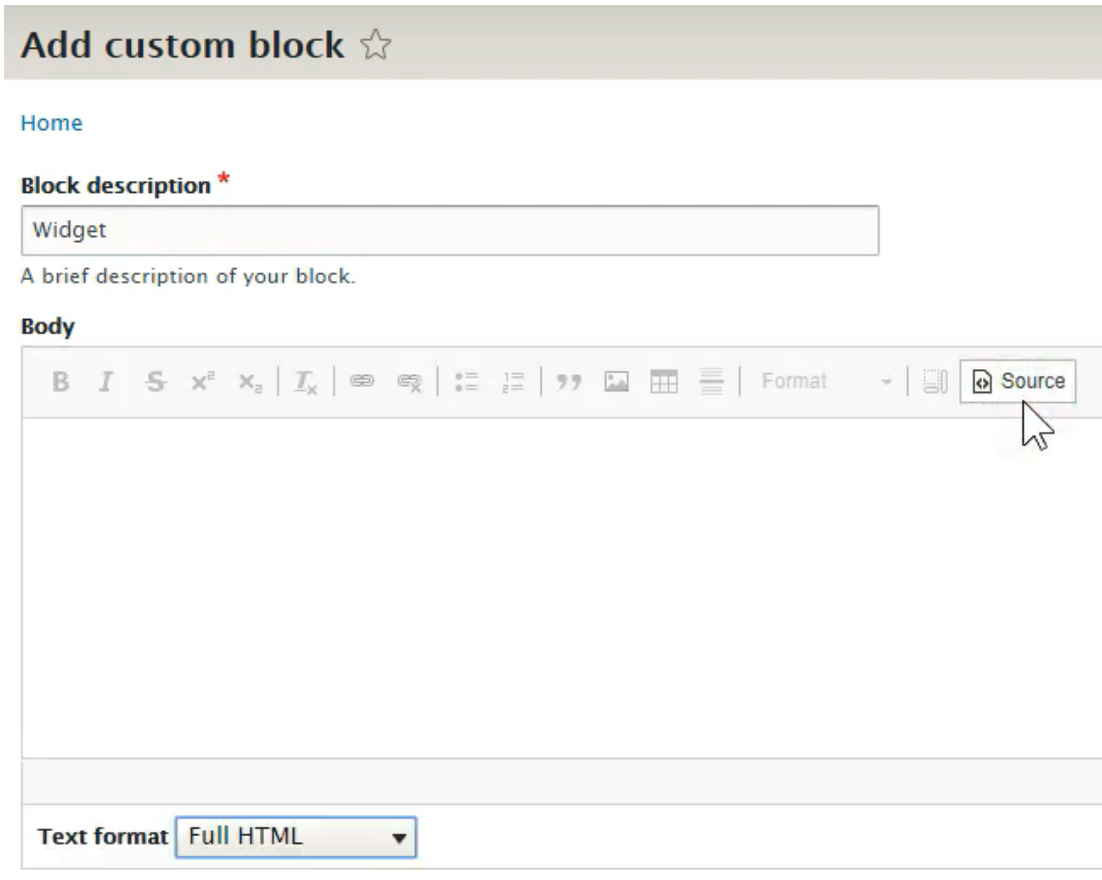
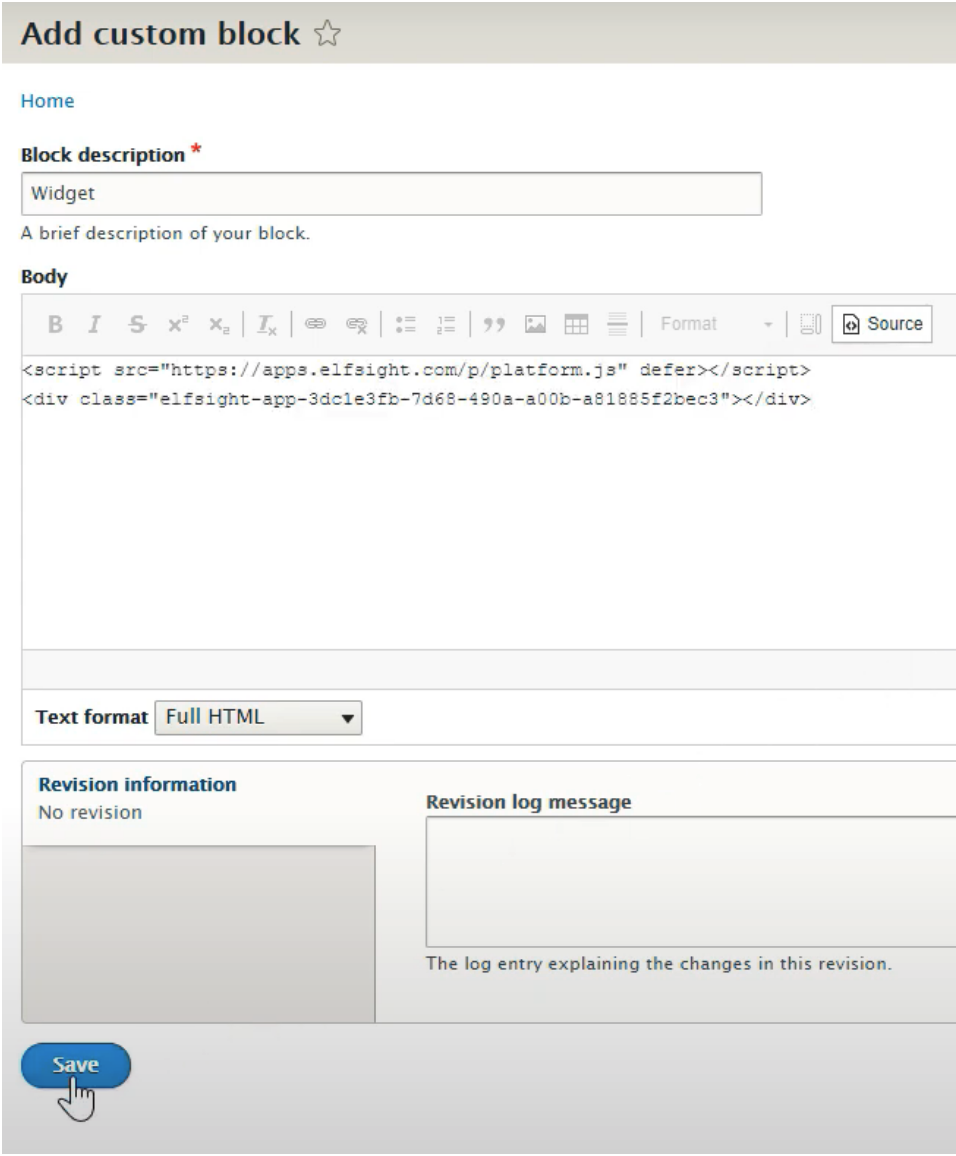
Give the block a name under “Block description”. In the image below, it can be seen that the block is named “Widget”. Under “Text format”, select the option “Full HTML”. Finally, enter your content under HTML view, you do this by simply clicking the button “Source” and you are done.
Now we want to paste the implementation code of Wappy into the empty field. To do this, open your Wappy account and go to your widgets.
Have you created a widget before? Click on it. Your screen will then look like this:
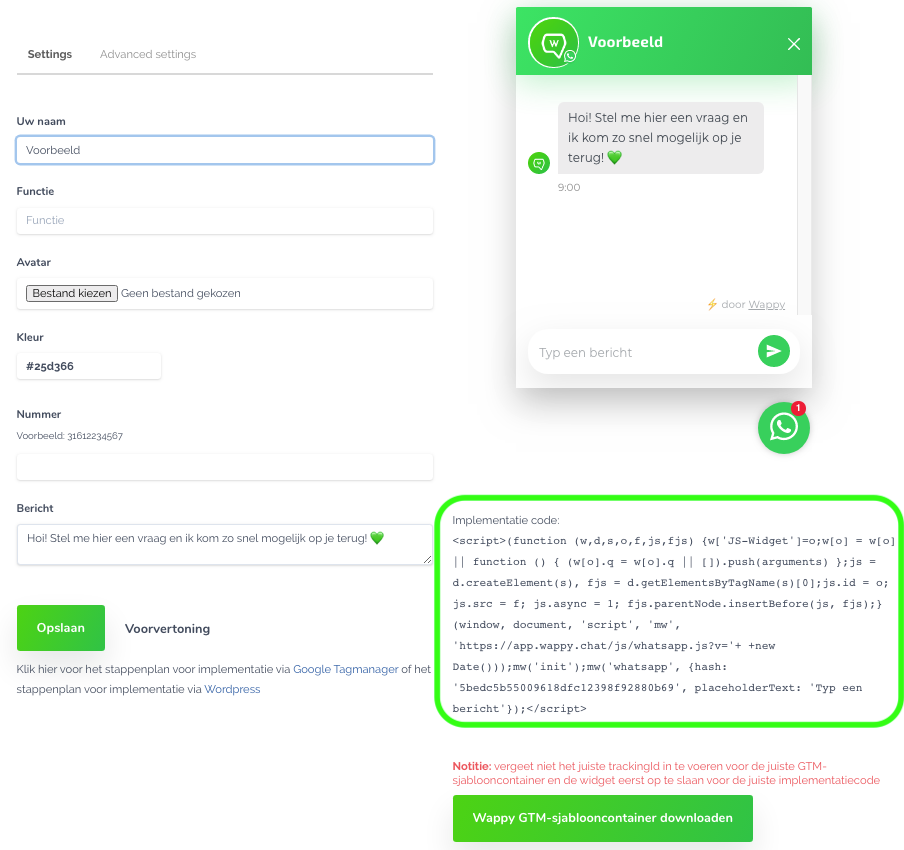
Don't have a widget yet? Then go to 'Widgets' and then to 'create a widget'. You can now fill in the information on the left side of your screen and save it. Once you have done that, you will see the implementation code in the bottom right corner as shown in the image above.
Copy the implementation code from the Wappy website. Now go back to your Drupal website and paste the implementation code into the empty field under 'Body'. Don't forget to click save!
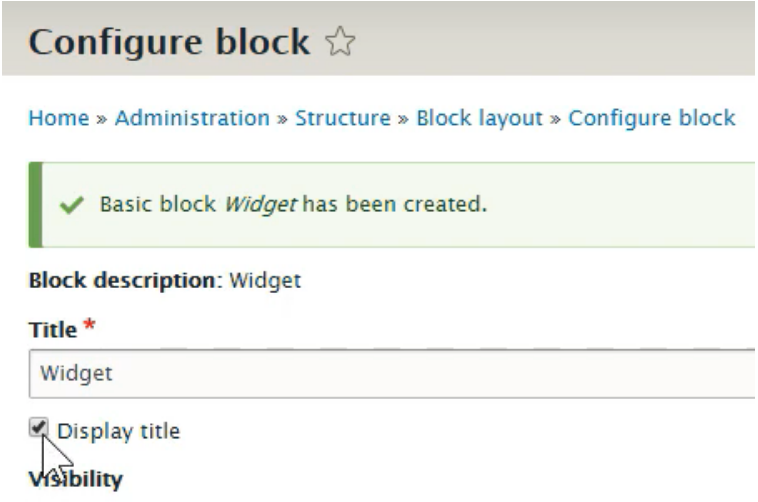
After you have saved the code, you will be taken to the ‘Configure Block’ page. Here, you uncheck the checkbox for ‘Display title’. Under ‘Visibility’, select all content types on which your widget should be displayed.
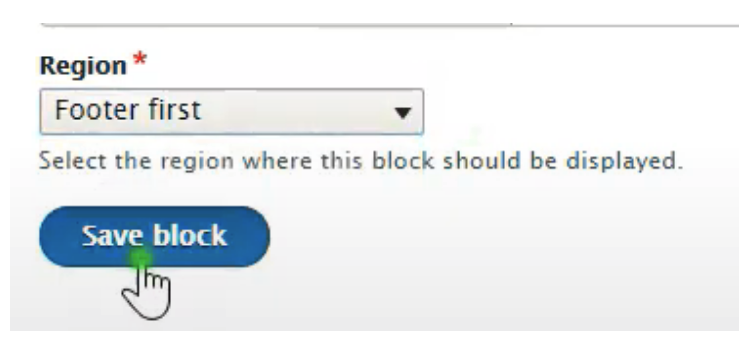
Finally, click on the region under ‘Region’ where the block should be displayed and click on ‘Save Block’.

Did you save the block? Then scroll down the page and click on ‘Save blocks’ at the bottom.

Success! You are now ready to communicate with your website visitors via WhatsApp.
Don't have a Drupal website, but want to know how to install Wappy on your own website? Then read one of our other guides!
niice
Wappy helps businesses connect with website visitors through WhatsApp. With over 2,400 websites using our widget, we share practical tips on WhatsApp Business and customer communication.
End of this Wappy article🤓


Do you want to try Wappy first? Then we have a free version available for you!
Over 2,400 websites use Wappy for customer contact